In this tutorial you will learn
- how to create a pxDoc project in Eclipse
- first basic pxDoc keywords to design your first document generator
- how to launch your first document generation.
You can download the sample Word stylesheet, that may be required very soon.
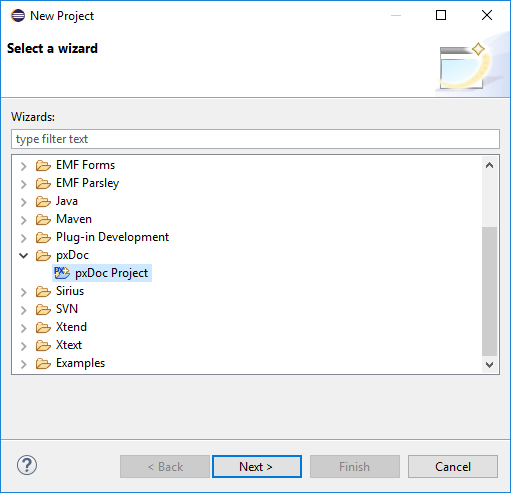
Creating a new pxDoc project in Eclipse
Create a new pxDoc project by choosing File ? New ? Project… from the main menu.
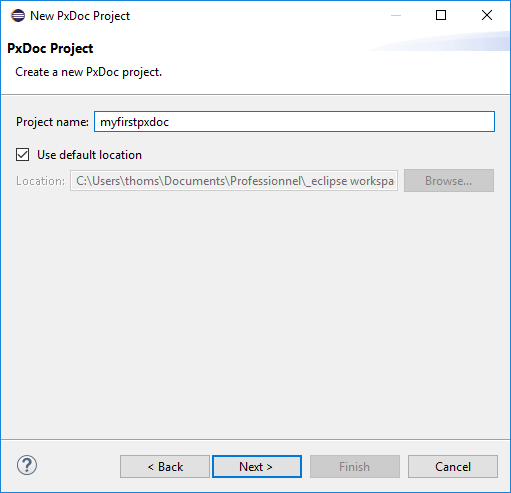
Set a valid Eclipse project name for your pxDoc project.
Choose Next to get into your new pxDoc project details:
Set a valid java class name for your generator (here "HelloWorld").
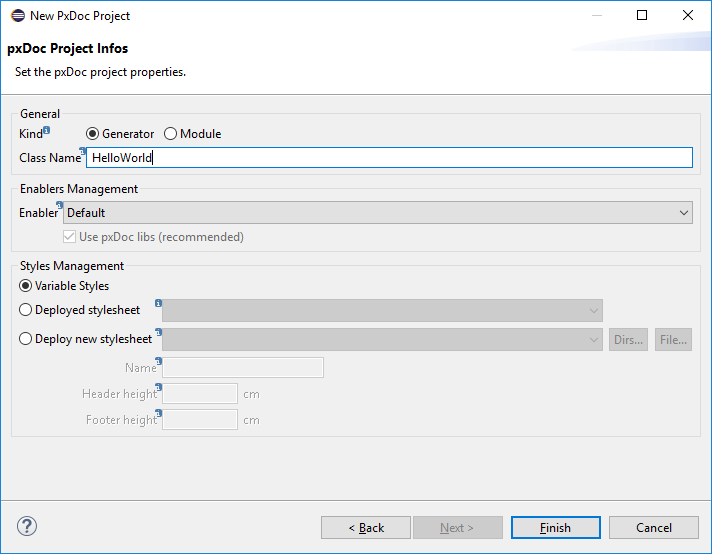
You can also use the stylesheet you have just downloaded by selecting Deploy new stylesheet
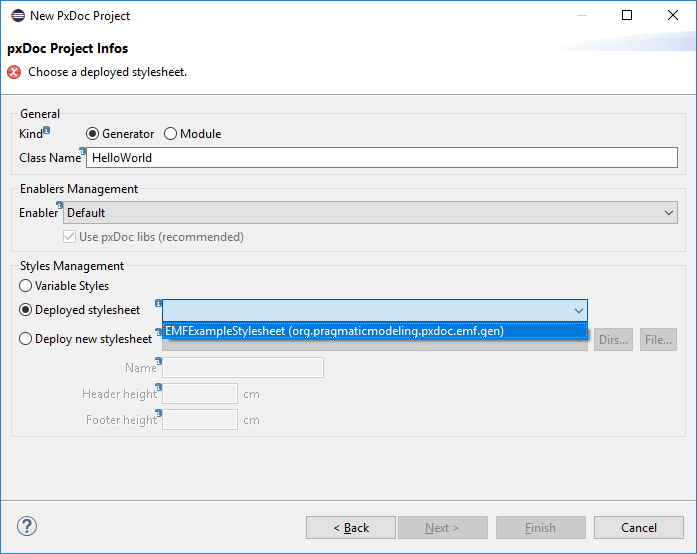
In the Styles Management section, select Deployed stylesheet and the EMFExampleStylesheet stylesheet (deployed in the EMF generic generator that is always available in pxDoc).
Select Finish.
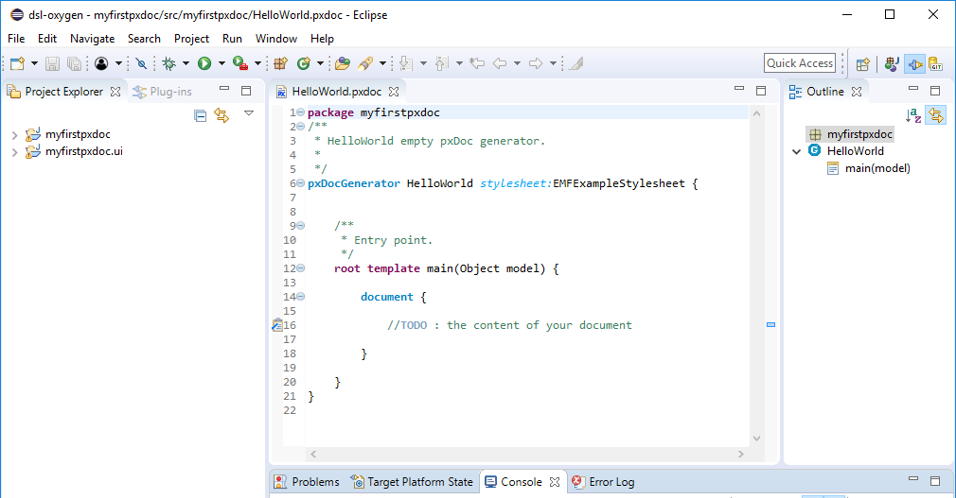
Your pxDoc project will first open with an empty pxDoc generator (.pxdoc file), and should look like the following screenshot:
And after a little while, the UI project is generated (by the pxGen tool)
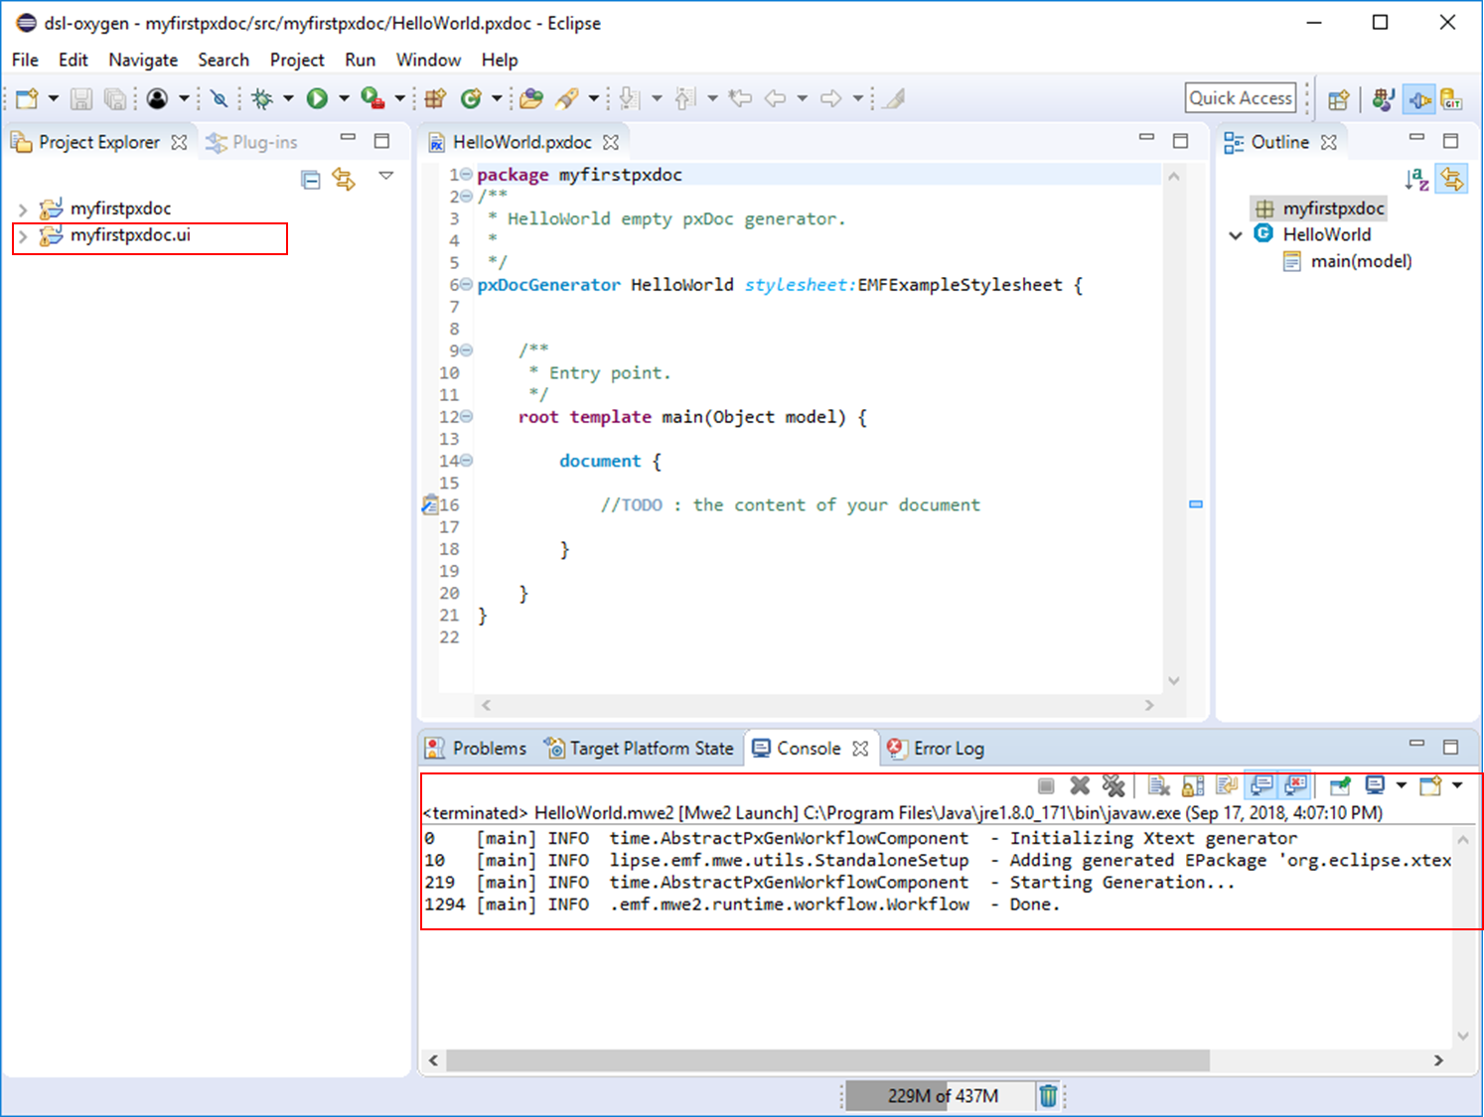
You may have a warning with com.google.inject.multibindings during the generation of the UI project, according to your Eclipse configuration. It has no impact!
You are ready to start describing your generator
Modifying generation scripts
Copy-paste the following self-explaining scripts into your pxDoc file and save it.
package myfirstpxdoc

/**
 * HelloWorld empty pxDoc generator.
 */
pxDocGenerator HelloWorld stylesheet:EMFExampleStylesheet{

   /**
    * Entry point.
    */
   root template main(Object model) {
      // a document starts here
      document {
         // apply the style Heading1
         #Heading1 {"A title 1" }

         // apply the style Heading2
         #Heading2 {"A title 2" }

         // "some text in Normal style"
         "Hello World !"

         // dummy example with java : why not printing your environment variables ?
         #Heading2 {"Environment variables"}

         // we iterate the system environment variables
         // and generate a bullet list item for each of them
         for (key : System.getenv.keySet) {
             // apply the style ListBullet
             #ListParagraph{key " = " System.getenv(key) }
         }

         // start a landscape section
         section landscape
         // few paragraph breaks...
         §§§§§
         // apply the style Title
         #Title {"pxDoc is fun !!!" }
      }
   }
}
Launch the pxDoc generator
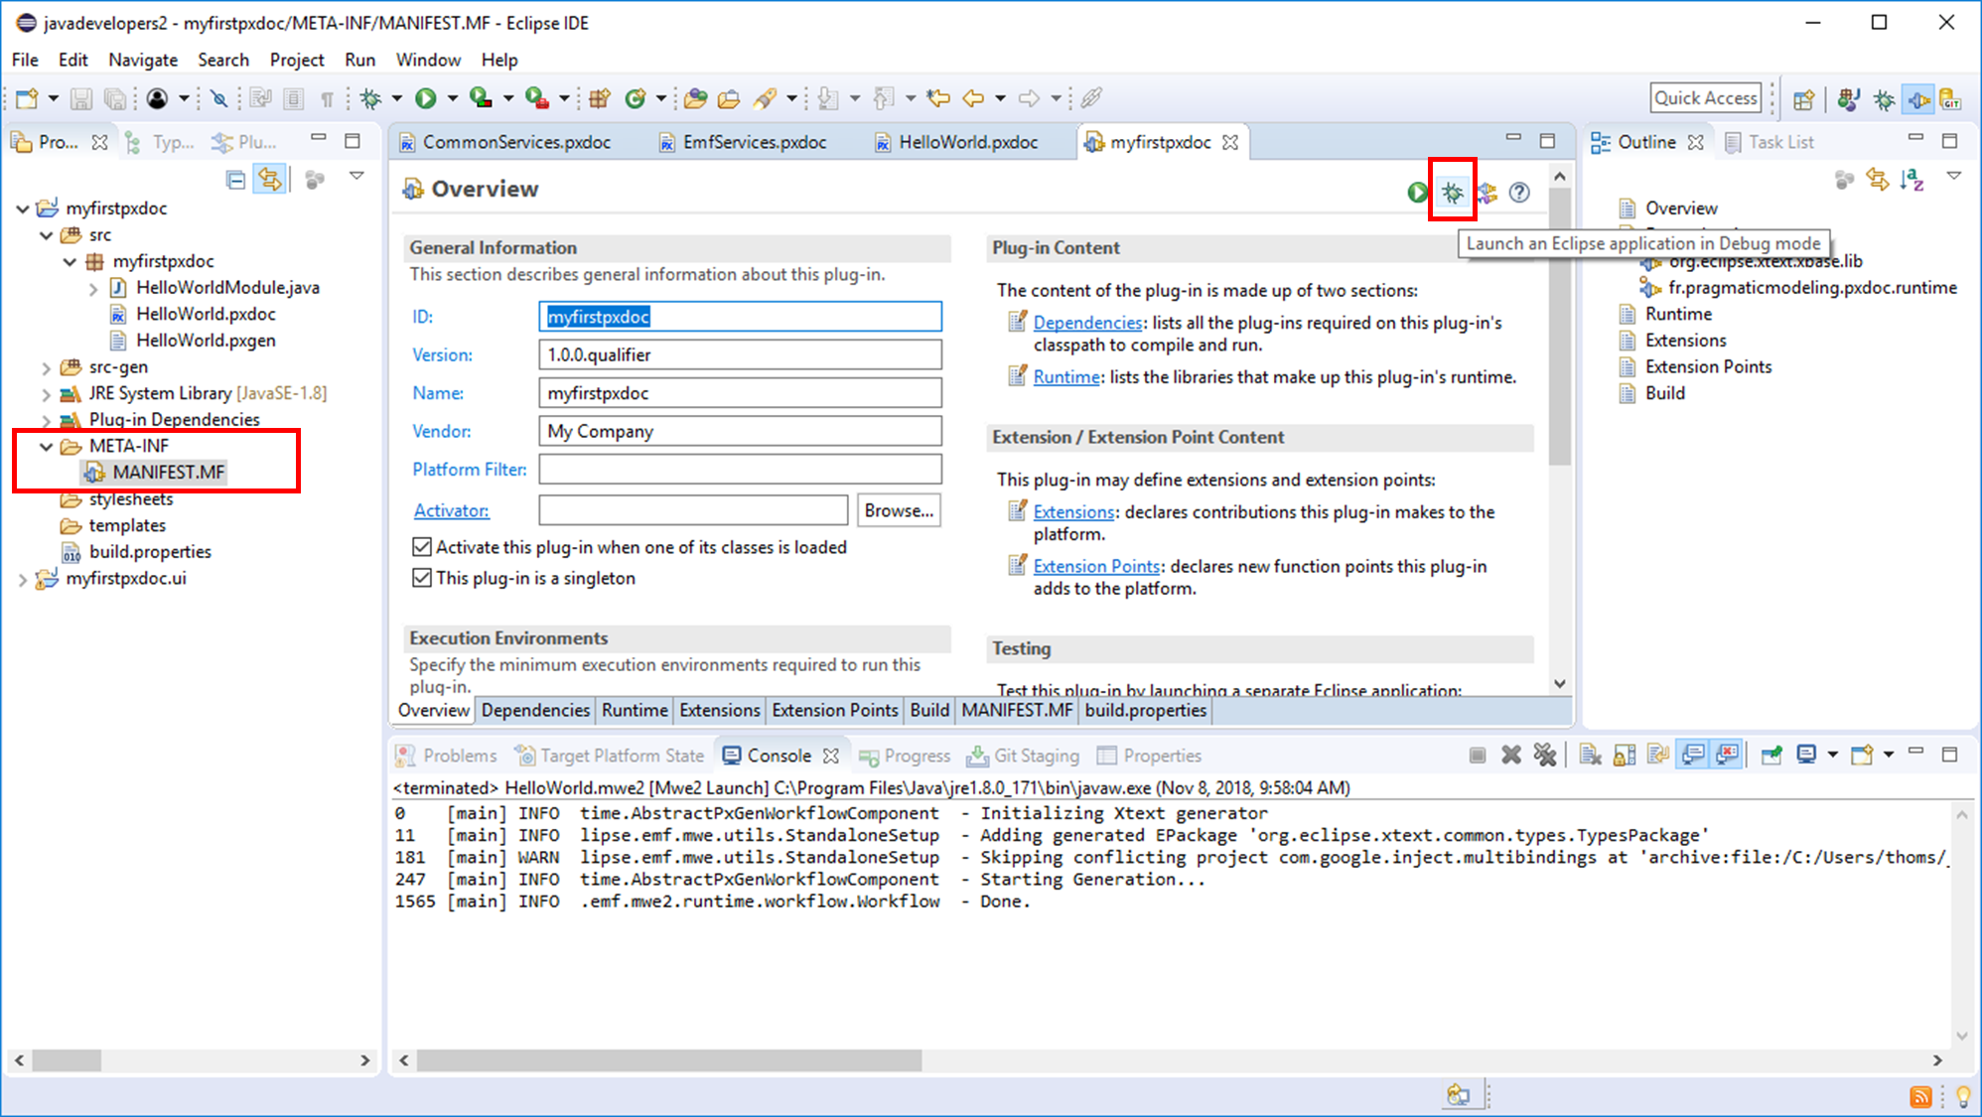
Open the MANIFEST.MF file, and select the Debug button.
Note : in Debug mode, you can modify your pxdoc file and test your evolutions immediatly in the second running eclipse application. You can also set breakpoints in any Java code or your pxdoc file.
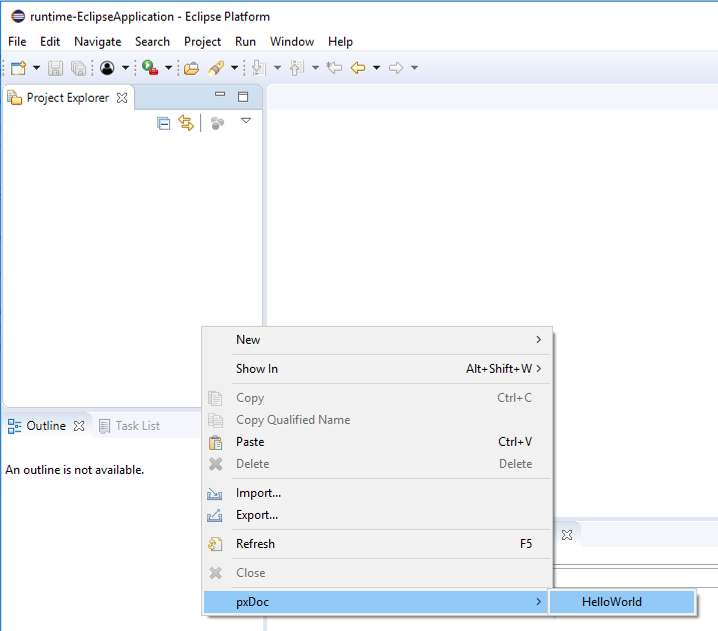
A new eclipse application opens.
As we did not modify the object provided in the root template (Object), we can right-click anywhere on the Project Explorer to get the pxDoc menu. Select pxDoc → HelloWorld.
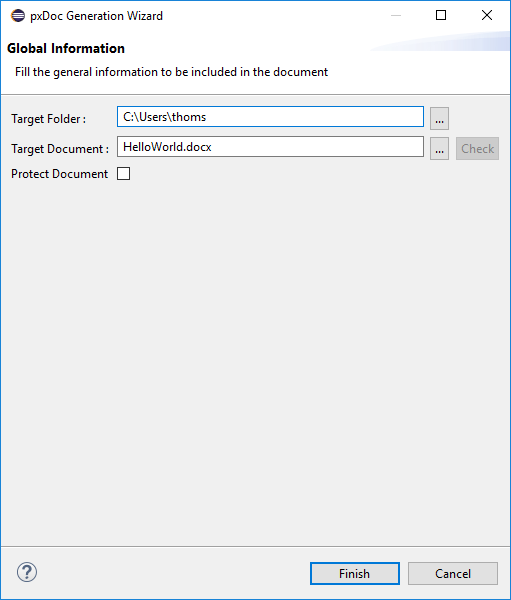
The pxDoc generation wizard opens.
Set a destination file for your generated document, and hit Finish.
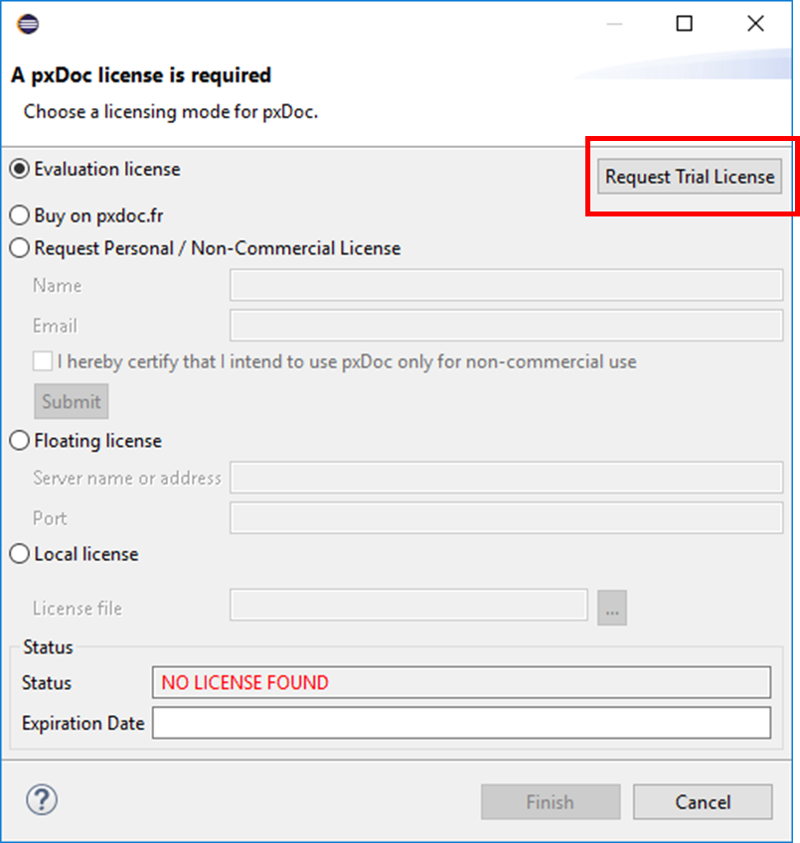
If you did not activate a license yet, a new pop-up window proposes to Request and Activate an evaluation license: click on Request Trial License
If the license is not automatically activated, click on Activate
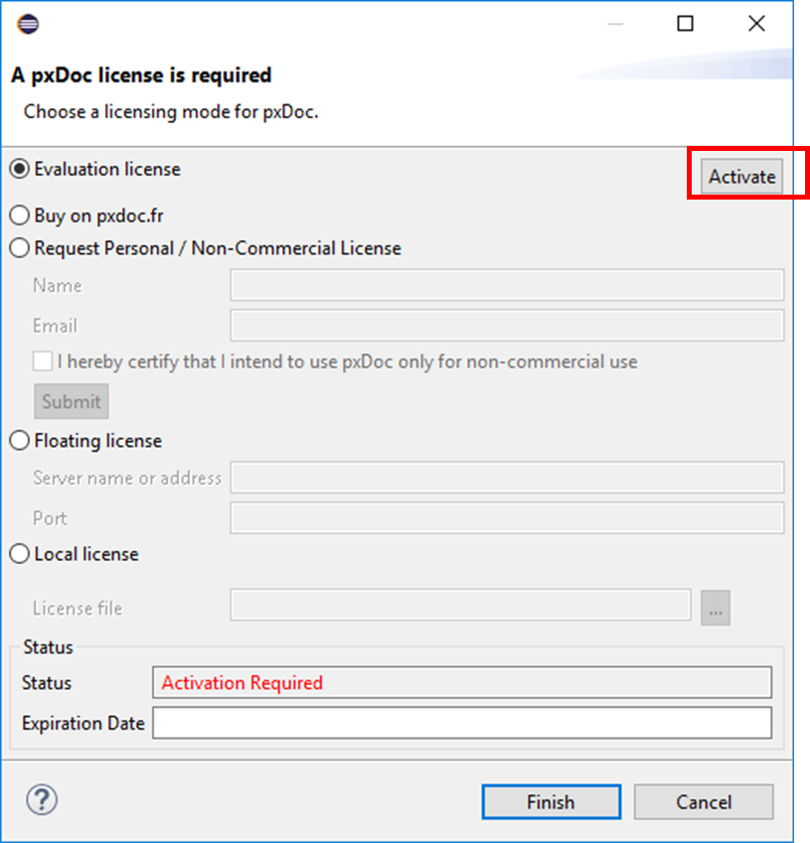
Click on Finish.
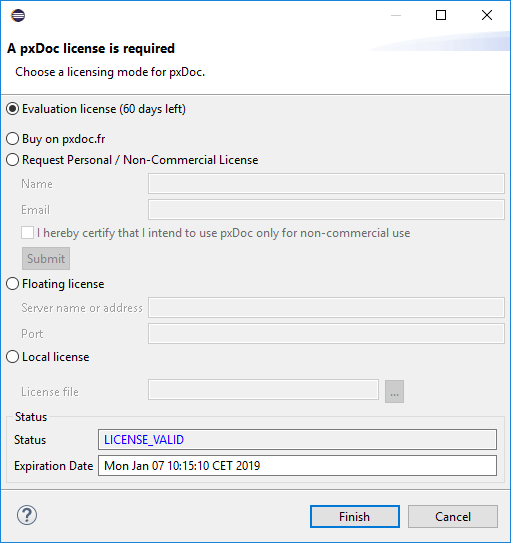
The document generation starts and the generated document finally opens.

Congratulations ! You have generated your first pxDoc document !
You can try to create a new generator based on one of your own stylesheet or use the stylesheet from one of the pxDoc examples: just may just have to update accordingly the style names (#Heading1,#ListParagraph...).